|
You may have noticed that there
were a few buttons in the Print dialog box that we didn’t talk about.
That’s because each of those buttons opens advanced print properties.
We’re going to look at each of those buttons now.
The first button is the
Properties button in the printer section.
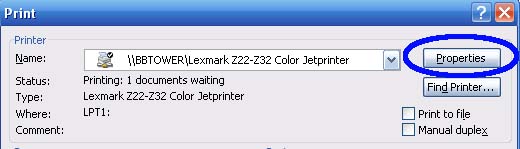
When you click this button, a
window will open with properties specific to your printer. This means
that the contents of the window depend on what printer you’re using.
Let’s take a look at a sample
window.
|
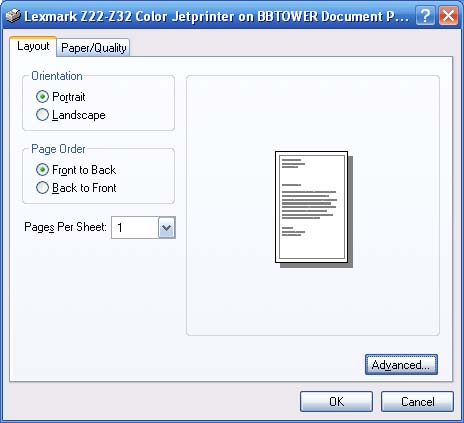
Orientation |
Change your page’s
orientation from portrait (vertical) to landscape (horizontal). |
|
Page Order |
Print from the first
page to the last page (Front to Back) or from the last page to
the first page (Back to Front). |
|
Pages Per Sheet |
Specify how many pages
to print per sheet of paper. |
When you change one of those
options, the preview will show in the pane on the right.
Now, let’s have a look at the
paper tab.
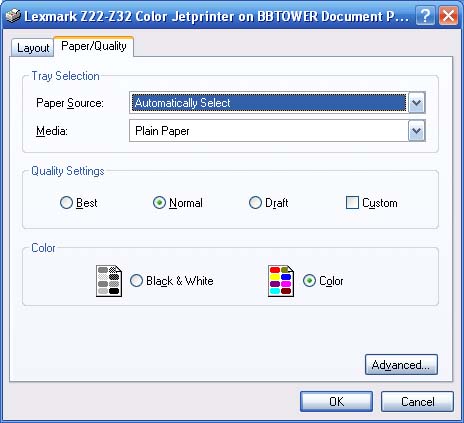
The paper tab has these options:
|
Paper Source |
Choose where to feed
paper from. |
|
Media |
If you’re using special
paper (like iron-on material or glossy paper), set that option
here. |
|
Quality settings |
If you’re just printing
a draft copy, or if this is your final copy, you may want to set
better or worse quality settings using these radio buttons. |
|
Colour |
Choose whether to print
in black and white or colour. |
Once you have set your options,
click OK to go back to the main print screen. The options we just set
will apply to all documents, but they will reset to the default after
you close Word.
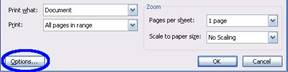
Now, let’s take a look at the
Options button in the bottom left hand corner of the print screen.
Unlike the printer properties,
these should stay the same no matter what printer you’re using. After
you set these options, they will apply to all documents. They will never
change until you change them.
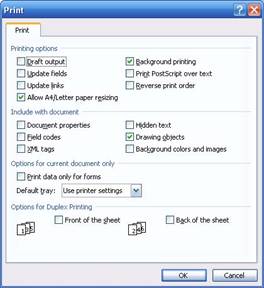
When you click the Options
button, you will see a window with just one tab (you can see a sample on
the next page). Here are the options you will have:
|
Printing options |
Draft output: Reduces
quality for draft documents. |
|
|
Update fields: If you’re
using a document with fields (like a table of contents or
headers and footers) check this box for the fields to be updated
before printing. |
|
|
Update links: If you’re
using a document with links (like an index), check this box for
the links to be updated before printing. |
|
|
Allow A4/Letter paper
resizing: Enables the option to resize for letter-sized paper
(8.5 by 11 inches). |
|
|
Background printing:
When this box is checked, printing will run in the background,
meaning you can still work in Word when your document is
printing. |
|
|
Print PostScript over
text: If you have converted your document from a Macintosh Word
document, and that document contained print fields, check this
box to print those fields. |
|
|
Reverse print order:
Prints from the last page to the first page. |
|
|
|
|
Include with document |
Check any of these boxes
to print these elements with your document. |
|
|
|
|
Options for Current Document Only |
Print data only for
forms: If you are using an online form and have entered
information into it, this box will print the information only,
not the form. |
|
|
Default tray: Specify
your default printer tray. |
|
|
|
|
Options for Duplex Printing
(printing on both sides of the page) |
Front of the sheet: Sets
the order of pages on the front of each sheet. Check this option
to print page 1 on the bottom of each sheet, or uncheck it to
print page 1 on the top. |
|
|
Back of the sheet: Sets
the order of pages on the back of each sheet. Check this option
to print page 2 on top, or uncheck it to print page 2 on the
bottom. |
|
|
You can look at the
images in the Printer Options screen for a visual explanation of
how this feature works. |
Once you’re done configuring
your printer options, click OK. Then, click the OK button to print or
click Cancel to return to your document.
|