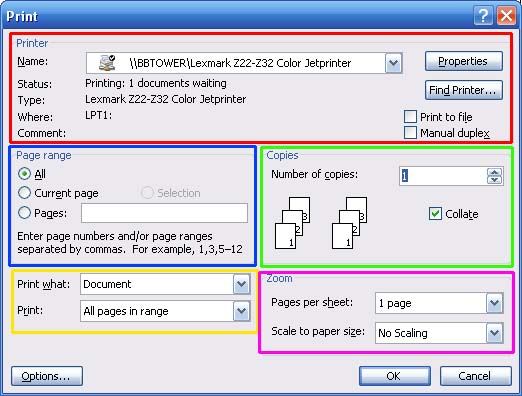
When you press Ctrl + P or click the File menu and click Print, you will see this window:
Let’s take a look at each section of this window.
The first section, labelled Printer (circled in red in the sample above), specifies your printer’s name, status, type, and location. (You can change which printer you’re using by clicking the printer’s name; this lets you pick a different printer from the drop-down menu.) You can also check Print to a File to print your document to a .prn file instead of to paper. You can also check manual duplex to print on both sides of the page. (Word will print all of the first sides of your document, and then prompt you to re-feed the paper to print the second side, unless your printer does this automatically.)
The next section, labelled Page Range (circled in blue in the sample figure), allows you to select a page range. You can print all pages, the current page, selected text, or manually enter pages into the text box. There are a few ways to specify pages by typing them; here’s a list of the most commonly used ways:
You can also combine these commands. For example, you could type 1,3,5,9-11,17- to print pages one, three, five; pages nine to eleven, and page seventeen to the end of the document.
Next up is the “Print What” section, circled in yellow in the sample above. If you click the first drop-down menu (Print What), you can choose from a list of these document elements: - Document - Document properties - Document showing mark-up - List of mark-up - Styles - AutoText entries - Key assignments.
You can also use the Print drop-down menu to print the whole document, just odd pages, or just even pages.
The fourth section, circled in green, is the copies section. Here you can enter the number of copies you want to print in the text box. Check the Collate button if you want copies to be kept together (to save you from sorting through the document after it’s printed).
The last section, titled Zoom and circled in purple, allows you to specify how many pages per sheet to print and if you want to scale to a certain size of paper.
Once you’ve got your options set, click Print! (You can also click Cancel to return to your document.)
|