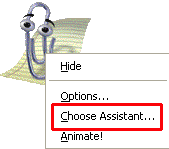
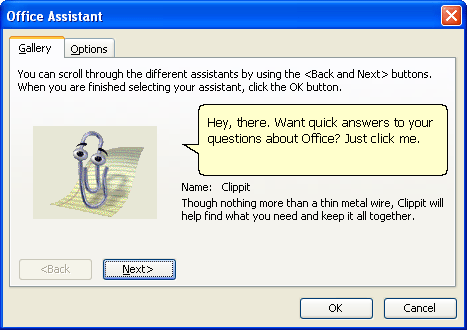
There are a few ways you can change the Office Assistant to suit you. The biggest way is by changing the character that appears. To do this, make sure the Office Assistant is shown (you may need to enable him using the steps discussed above), then right-click on the Office Assistant and click Choose Assistant. Once you do this, the Office Assistant gallery will come up:
You can click the Next button to scroll through the different characters. Characters included with Office (other than Clippy) include: - The Dot - F1 the Robot - Office Logo - Merlin the Wizard - Mother Nature - Links the Cat - Rocky the Dog
Once you’ve chosen your character, click OK to apply your changes or cancel to discard them.
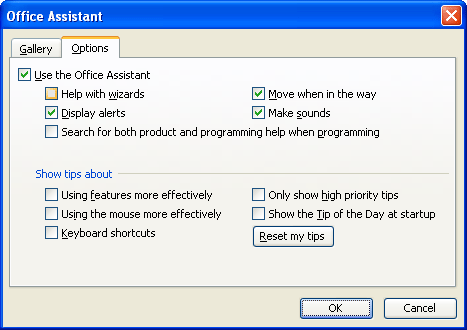
We can modify other Office Assistant options by right-clicking the Office Assistant and clicking Options, or by clicking the Options tab in the Gallery window. (You can see an example of this window below.) You can modify Clippy’s behaviour (such as sounds and movement), control what kind of help he offers, and specify what kinds of tips (if any) you want him to give you. (Remember that we can check or uncheck boxes just by clicking on them.)
Just like the Office Assistant Gallery, we can click OK after you’ve made the necessary changes, or click Cancel to discard them. All your changes will be applied right away.
|