|
We talked a little
bit about the different ways to use the different parts of the interface
above. Now, let’s break down different types of action items and see how
we can interact with Word. As examples, we are going to refer to some
concepts we haven’t covered yet, so try to focus on the action item
rather than its possible applications.
|
Icons |
Just like
icons on your desktop, toolbar icons are small buttons with
pictures that represent actions. When you click the button, that
action will happen. Icons are mostly seen on toolbars. For
example, you could click the printer icon  on the
standard toolbar and your document would print. on the
standard toolbar and your document would print.
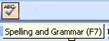
One great
thing about icons is ScreenTips. If you put your mouse over an
icon, a small box will pop up telling you what it does, like
this:
This can be
really useful if looking at an icon doesn’t tell you what it
does.
|
|
Drop-down menus |
You can use
these menus to pick from a number of choices. With some menus,
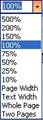
you can type in your choice. A good example is the Zoom menu on
the toolbar, which looks like this:

You can
click where it says 100% and type in another number, or you can
click the drop-down arrow and then click on an item from a list
of values, like the sample below.
 |
|
Menu items |
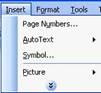
If you
click on a menu heading at the top of your Word screen (like,
File, Edit, Window, or Help), the menu will expand to show a
list of commands. You can then click on any item to perform that
action. In the sample to the right, we’ve clicked on the Insert
menu. Now, we can click any of the items below it to perform
that action.
|
|
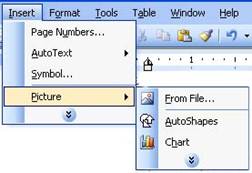
Expanding menu
items |
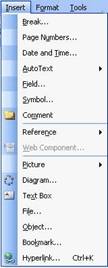
Some menu
items have a right-facing arrow (►) beside them (see below
image).
This means
that once you click on (or put your mouse over) that item, an
additional menu will show up (expand). Let’s see what happens if
we had clicked on the Insert menu, then clicked Picture:

We now have
a number of photo types to choose from. Just like regular menu
items, we can click to perform any of the commands in this
expanded menu. In the sample on the right, we would click a
command to insert that item type.
|
|
Checked items |
Some items
in a menu may have a check next to, or a box around them.

This means
that the item is turned on or enabled. If it has a check,
normally you can turn the command off by clicking it, which will
uncheck it. (In the sample below, we could disable rulers by
clicking it.) Other items can’t be unchecked; you must pick
another item to switch view. (One example of this is the view
menu; you must have one view selected at all times, otherwise
you wouldn’t be able to view anything!)
 |
|
Chevrons |
In the
sample below, do you see the two stacked arrows at the bottom of
both menus? Those are called chevrons. Microsoft Word only shows
you the items you have (or the items it thinks you will) use
most by default. To see the rest of this menu, click the
chevrons. (The menu may also automatically expand after it’s
been open for a few seconds.) Then you’ll see the entire menu. (You may notice that items that
were in the shortened menu have a lighter colour next to them.)
|
| Another way to
open menus is by right-clicking. Right-click menus aren’t like
the main menu bar, which stays the same. When you right-click,
menus are contextual, which means they change depending on what
you’ve right-clicked on.
For example, if I right-click
on a toolbar, here’s the menu I get (see the example on
the right). This menu allows me to choose which toolbars I have
open. (Ones already open are checked; we can click them again to
close them.) |
 |
| But if we
right-click on a misspelled word, we get a very different menu:
|

|
Right-click menus
can contain any of the items that we talked about before (menu items,
expanding menu items, or icons with menu items), although they are never
shortened with chevrons. Using a right-click menu is as easy as clicking
on the command you want!
Some menu items
will open dialog boxes. A dialog box is an extra window that opens up
with options. You can tell which menus will open dialog boxes because
they have three dots after the option. One of the most common dialog
boxes is the one found when you click on the Tools menu and click
Options. (You can see a sample below.)
Let’s look at the
different elements in a dialog box.
|
Tabs |
Dialog
boxes can contain options for different items. Click the tabs
(usually at the top of the screen) to change dialog boxes. (In
the example below, there are nine different tabs ranging from
File options to User Information.)

|
|
Drop-down menus |
Just like
toolbar drop-down menus, you can type in the box or click the
down arrow to choose from a list of values.
|
|
Check boxes |
If an item
is checked, it means it’s enabled. If the item is unchecked,
it’s disabled. Click the check-box to change this status.

|
|
Radio buttons |
Use these
buttons to choose from a list. Like check boxes, click to change
the item that is in use. Normally, only one item from the list
can be selected.

|
|
Text boxes |
These boxes
must be filled out by typing in them. In the sample below, the
text box allows you to type your name.

|
|
Buttons |
Some
buttons open more dialog boxes and allow you to specify advanced
settings. For example, in the sample below you can click the
Settings button to see more options.

|
|
OK and Cancel
Buttons |
In any
dialog box, you can click OK to save your changes. You can also
click Cancel to discard your changes. (Some dialog boxes have an
Apply button so you can apply your changes right away, before
making more changes or without having to close the window you
are viewing.)

|
Another way to
implement commands in Word is by using shortcut keys. Shortcut keys are
when you press a key (or sometimes a combination of two or even three
keys at once) to perform an action instead of clicking on the icon or
finding its toolbar command. Sometimes you can see this shortcut in the
icon’s ScreenTip, and sometimes it’s listed in the menu (next to a
command).
There are hundreds
of shortcuts in Word, but here’s a list of the most common ones:
|
Open a new
document |
Ctrl + N |
|
Save a file |
Ctrl + S |
|
Open a file |
Ctrl + O |
|
Print a document |
Ctrl + P |
|
Close Word |
Alt + F4 |
|
Select All |
Ctrl + A |
|
Copy text |
Ctrl + C |
|
Cut text |
Ctrl + X |
|
Paste text |
Ctrl + V |
|
Find text |
Ctrl + F |
|
Align text to
centre |
Ctrl + E |
|
Align text to
left |
Ctrl + L |
|
Align text to
right |
Ctrl + R |
|
Justify text |
Ctrl + J |
|
Undo last action |
Ctrl + Z |
|
Redo last action |
Ctrl + Y |
|
Check spelling
or grammar |
F7 |
|
Get Help |
F1 |
|